[14 December 2008]- Product Isolation
Day 4 -
Isolation and Purification of Product
Procedure for isolation.
1. 2 tubes of 10 mL of culture broth were obtained.
2. Cells were obtained by centrifugation at 10,000 rpm for 5 minutes.
3. Supernatant was then poured into another tube.
4. Both tubes were then placed under the UV light to do confirmation of product.
5. Pellet was resuspended by using a micropipettor in 500µl of TE buffer of pH 7.5. Re-suspension of pellet is needed until no visible clumps.
6. 2 drops of lysosome was added into the resuspended cell pellet. This is to initiate the enzymatic digestion of the bacteria cell wall.
7. Freezing of the tube contents was done in the liquid nitrogen and transferred into a beaker which contained warm water for thawing. This procedure was repeated for another 2 times so as to ensure the rupturing of bacteria cell wall had already completed.
8. Cell disruption was completed by the process of sonication where ultrasonic waves cause the bacteria cell wall to implode under the vibrational pressure. This sonication process was done on ice for 4 cycles of 25 seconds with 10 seconds rest in between sonication cycles.
9. The tubes were then centrifuged for 20 minutes at 10,000 rpm.
10. Its pellet and supernatant were separated as done above. Pellet was resuspended using 400 µl of TE buffer.
Using of Enzymes (Method 1)

The 2 tubes of culture broth were obtained.
Centrifugation~~

 After centrifugation.
Supernatant was removed and 2 drops of lysosome was added to the resuspended cell pellet.


Freezing and Thawing (Method 2)

 Process of waiting for our turn...Zzzz
 Yipee!! haha...finally is our turn!
 Glows!!!
Procedure of Purification
1. Eight test tubes (“1 to 8”) and a “blank” were labeled and placed in a rack.
2. Blank was filled with 2ml ammonium bicarbonate; it was used as a guide to mark the rest of the test tubes with a line at the 2ml level.
3. The column was carefully drained into a waste beaker until the buffer was just even with the top of the gel bed.
4. Cell-free extract was transferred to the top of the gel bed by gently swirling a pipet around the inside edge of column, just above the top of the packed matrix.
5. Waste beaker was then removed. A test tube was placed under the stop cock to prepare collecting the fractions. Each test tube was filled up with buffer till the 2ml mark. This is known as a fraction.
6. Stop cock was slowly opened. Sample was then allowed to flow completely into gel bed and then collected in the first test tube. Flow rate was adjusted to a 1 drop/ 2 sec interval. The top 2-5mm column was run dry for a short time.
7. 50mM ammonium bicarbonate buffer was added to the top of the column while taking fractions. A 2-3cm column of buffer was maintained on top of the gel column to provide consistent flow of buffer through chromatography matrix.
8. 2ml fractions were continued to be taken until the 8th tube was filled.


Column was drained into the waste beaker.


Process of collecting functions...


Functions readings were taken.
Results of reading


As seen from the graph, a single, distinct and narrow peak resulted at around fraction 3. This shows that fraction 3 which has the highest OD reading as compared to the rest, contains the highest concentration of GFP. Therefore, the results suggest that a rather high degree of purification was achieved as most of the GFP was purified out from the sample at a single time point (fraction 3). Also, when viewed under the UV light, fraction 3 glowed brightest as compared to other fractions. Fractions 4 to 8 show zero OD reading, this suggests that GFP has been completely eluted out from the sample.
!!! Learning Points !!!
We were first given an introduction about the fermentor design, how does it works, the different parts and the uses of the different probes before we proceed to the actual experiment. We were also given practice on doing the sampling, so that we are more confident when doing the actual hourly sampling and hopes that nothing goes wrong since practise makes perfect.
We learnt that fermentation consists of three parts, media preparation, equipment preparation and seed preparation.
Three types of cell disruption methods (Enzymes, Freezing and Thawing and Sonication) were performed for this experiment; this is to further ensure that isolation is good whereby more of the product (GFP) can be obtained since it is intracellular.
If isolation was not done properly, it might affect the product yield. Therefore, this step was especially taken care of. Gel permeation chromatography was used for purification of GFP from the sample. This is also another step that determines the outcome of the result. Skills of using the spectrophotometer were also once again emphasized.
In conclusion, doing fermentation is never an easy job. Every single step has to be taken care of, as contamination at any step will simply kill the cells and ruin the whole experiment. And therefore, the importance of good aseptic techniques comes in.
Besides that, team work and cooperation is also very important, as when doing the hourly sampling, each of us has to make sure that we did our part correctly. We have to pay full attention when given the briefing on how to perform the sampling. Also, when doing some parts of the experiment, the work load is divided among us. It is when each of us played our part well, can the whole fermentation experiment then be a success.
♦ ♦ ♦ ♦ ♦ ♦ ♦ ♦ ♦ ♦ ♦ ♦ ♦ ♦ ♦ ♦ ♦ ♦ ♦ ♦ ♦ ♦ ♦ ♦


 After centrifugation.


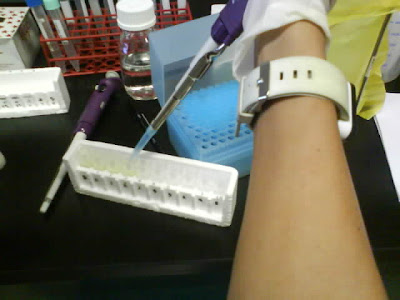
 Demonstration by our Mr Ong!