[10 December 2008]- Objectives
MB0704 Proudly presenting the study of
Vinegar-making...
[Overall Objective]
To culture micro-organisms in batch fermenter and to grow
and extract green fluorescent protein(GFP)
Experiment No 1: Famililiarisation with the Bioreactor
and its Operation
1) To get familiarized with the parts and components of microbial
and mammalian bioreactors
2) To get introduced to the basic operation procedure of a bioreactor
Experiment No 2: Equipment,Media and Seed Culture Preparation
1) To be able to describe the steps to prepare a bioreactor
2) To prepare the media for seed culture and scale-up fermentation 3) To prepare seed culture for scale-up fermentation
Experiment No 3: Inoculation,Fermentation and Monitoring
1) To carry out scale-up fermentation process to increase the yield of desired
Experiment No 4: Isolation and Purification of Product
1) To be able to isolate and purify the product (desired protein)
♦ ♦ ♦ ♦ ♦ ♦ ♦ ♦ ♦ ♦ ♦ ♦ ♦ ♦ ♦ ♦ ♦ ♦ ♦ ♦ ♦ ♦ ♦ ♦
[11 December 2008]
GFP...
As for the non-science students, you guys must be wondering what the hell it is, let's get to the bottom of this in simple words...
Theory behind the Green Fluorescent Protein (GFP)
GFP is a fluorescent protein isolated from coelenterates, such as the Pacific jellyfish, Aequoria victoria, or from the sea pansy, Renilla reniformis. The green fluorescent protein (GFP) is made up of 238 amino acids - 26.9 kDa that fluoresces green by energy transfer when exposed to blue light. In molecular biology, the GFP gene is commonly used as a reporter of expression. Basically, it has been used to make biosensors, and many animals have been created that express GFP as a proof-of-concept that a gene can be expressed throughout a given organism. The GFP gene can be introduced into organisms and maintained in their genome through breeding, or local injection with a viral vector which can be used to introduce the gene.
In molecular biology, the GFP gene is commonly used as a reporter of expression. Basically, it has been used to make biosensors , and many animals have been created that express GFP as a proof-of-concept that a gene can be expressed throughout a given organism. The GFP gene can be introduced into organisms and maintained in their genome through breeding, or local injection with a viral vector which can be used to introduce the gene.

(Ribbon diagram of the crystal structure of GDP)
How the GFP gene is incorporated into E.Coli?
( E.coli is actually a type of common bacteria..)
The GFP gene is incorporated in E.coli firstly by inserting the GFP gene into the plasmid DNA known as the pGLO. The pGLO protein also contains antibiotic resistance gene which allows only the growth of transformed bacteria in an agar containing antibiotic like ampicillin. Subsequently, transformation solution is used to heat shock the pGLO plasmid into the E.coli cell. Heat shock is often done to increase the permeability of the cell membrane and allow uptake of the pGLO plasmid into the cell. Following that, the cells are allowed to grow such that it will eventually express the GFP gene and form protein. Other features on pGLO, like most other plasmids, include: a selectable marker, Ori (origin of replication), and an MCS (multiple cloning site) located at the end of the GFP gene. The plasmid is 5371 base pairs long. In supercoiled form, it runs on an agarose gel in the 4200-4500 range.
♦ ♦ ♦ ♦ ♦ ♦ ♦ ♦ ♦ ♦ ♦ ♦ ♦ ♦ ♦ ♦ ♦ ♦ ♦ ♦ ♦ ♦ ♦ ♦
[12 December 2008]- THE Machine.
Day 1 & 2
Some said it smelled like shit, some said it smelled like food. This scent was what greeted us on the first day of this experiment, the glorious star of the show- Escherichia coli. There we gathered, in the labs of Q6 getting used to the sweet aroma and knowing that it was just the beginning. We were in the presence of two mean-looking machines, which we found out to be the fermenters. Honestly, I thought they looked tortured.
 I mean, look at the poor thing, all covered in tubes like it was some kind of science experiment.
.....
Wait a sec, it is.
Anyway, this one was still sealed with aluminum foil because it was just out of the autoclave.
We looked into the parts of the fermenter and its purposes and such. Here's a drawing:


The names of the parts basically tells the purpose already, doesn't it?
And here's an attempt to label a photo of the fermenter:
 It's so much easier in 3D, I swear. OTL
-------------------------------------------------------------------------------------------------
Preparation of Media, Equipment and Seed Culture
WELCOME to our FUN lab practical session...
Media Preparation (Day 1)
1. 50g of LB was added to 2.0L of distilled water.
2. 100mL was transferred into 500mL shaker flask and the remaining 1900mL in the 2L bioreactor and autoclaved at 121ºC for 20 minutes.
3. Ampicillin was added to a final concentration of 100µg/ml once the broth has cooled to below 50ºC

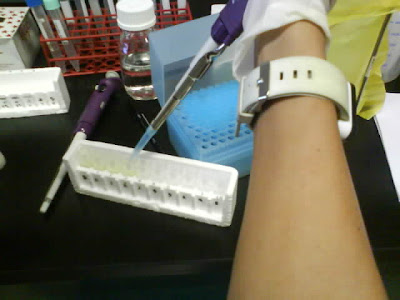
 After weighing... we poured 100mL of the LB medium into this HUGE shaker flask

ehum ehum...some medium had spilled onto the table..Oops!!! 
2L of distilled water is not as light as what you think,ahha...coz...is super heavy to pour them into the flask !!!
Equipment Preparation (Day 1)
1. pH electrode was calibrated using standard buffer solution.
2. pH, pO2, foam and level probe was installed into the top plate.
3. Additional agent lines for acid, base and antifoam were connected.
4. Other accessories such as exhaust condensers, air inlet and exhaust filters were also installed.
5. Cables except temperature probe was disconnected
6. All silicone tubings were clamped except for exhaust filter and female STT coupling of sampling unit.
7. All filters and sockets were covered with aluminumfoil
8. Equipment was autoclaved with steam at 121ºC for 20 minutes.
9. pO2 probe was polarized for at least 6 hours and calibrated by aerating with nitrogen.
10. Additional lines were connected to peristaltic pumps.

Using distilled water to test how a fermenter works first.
Seed Culture Preparation (Day 1)
1. pGLO transformed E.coli was obtained and streaked onto a LB/Amp/Ara plate and incubated for 24hrs.

It glow under the UV light! Yea !!! Nice one !
Seed Culture Preparation (Day 2)
1. Several colonies of pGLO transformed E.coli from the LB/Amp/Ara plate was obtained and transferred to flask containing 100mL LB medium with ampicillin.
2. Flask was placed in shaking incubator and incubated at 32ºC for 24 hours.
♦ ♦ ♦ ♦ ♦ ♦ ♦ ♦ ♦ ♦ ♦ ♦ ♦ ♦ ♦ ♦ ♦ ♦ ♦ ♦ ♦ ♦ ♦ ♦
[13 December 2008]- Fermentation Process
Day 3 -
Setting up and monitoring the fermentation process ...
 Tada !!! Our LB broth product!!!


 1. The control parameter must be set as below :
Temperature : 32°C (optimum or GFP folding and fluorescence)
pH : 7.5
Stirred speed : Min 10%, Max 90%. Control to AUTO
pO2 set point : Set point 20%, Control to AUTO
Stir to CASC & Airflow to CASC
Airflow : Min 25%, Max 100%.
2. Fermentor was inoculated with 100mL of seed culture and fermentation was continued for 24 hours.
3. 10mL blank sample before inoculation and an hourly sample were taken
And... our tedious day beings...
Each members rotated shifts to take the hourly sample. In total, we have 12 samples which also included the blank sample.


They glow under the UV light !!!
Calculation of log(x/x0) value for graph of cell growth :


The above graph shows the accumulated amount of bacterial cells in the fermentor over 10 hours. The amount of the bacterial cells in the fermentor gradually increases every hour when the sample was taken. This shows that the cells were having sufficient nutrients and oxygen therefore growing normally.
However there was a slight decrease in the amount of bacterial cells at the 6th hour. This might be due to the high concentration of bacterial cells depleting the oxygen at a fast rate. As a result, amount of oxygen is insufficient in the fermentor and bacterial cells are not able to grow properly. However, after adapting to the environment, bacterial cells continue to grow again and this indicates that the cells are still in the exponential phase.

From the history plot, we can see the temperature values (red), stirring rate (teal), dissolved oxygen, PO2 values (green), and pH values (purple). It can be seen that, basically, the lines fluctuates a lot.
As cells grow, they use up the nutrients, oxygen etc. Heat will be produced due to metabolism; pH will be decreased due to carbon dioxide given off. The system needs to adjust the parameters constantly to ensure that the cells are growing in their optimum conditions. Therefore, fluctuations of the values of the different parameters were seen.
From the history plot, the temperature was maintained around the optimal temperature of 32ºC. Any fluctuation detected by the temperature probe by more than 0.5’C is automatically adjusted back to optimum level. The pH was also maintained within the desired values of 7.5.
The stirrer control and the pO2 control are the values that indicate the progress of the growth of the bacterial cells. As pO2 value decreases (due to increasing amount of bacterial cells), the stirrer speed increases in order to ensure an even and faster distribution of oxygen within the fermentor. This accounts for the high fluctuations of these two curves (pO2 and stir speed) as seen in the history plot.
However, the general trends of the parameters were stable. This meant that the system is working well and hard making the conditions optimal for cell growth.
♦ ♦ ♦ ♦ ♦ ♦ ♦ ♦ ♦ ♦ ♦ ♦ ♦ ♦ ♦ ♦ ♦ ♦ ♦ ♦ ♦ ♦ ♦ ♦
[14 December 2008]- Product Isolation
Day 4 -
Isolation and Purification of Product
Procedure for isolation.
1. 2 tubes of 10 mL of culture broth were obtained.
2. Cells were obtained by centrifugation at 10,000 rpm for 5 minutes.
3. Supernatant was then poured into another tube.
4. Both tubes were then placed under the UV light to do confirmation of product.
5. Pellet was resuspended by using a micropipettor in 500µl of TE buffer of pH 7.5. Re-suspension of pellet is needed until no visible clumps.
6. 2 drops of lysosome was added into the resuspended cell pellet. This is to initiate the enzymatic digestion of the bacteria cell wall.
7. Freezing of the tube contents was done in the liquid nitrogen and transferred into a beaker which contained warm water for thawing. This procedure was repeated for another 2 times so as to ensure the rupturing of bacteria cell wall had already completed.
8. Cell disruption was completed by the process of sonication where ultrasonic waves cause the bacteria cell wall to implode under the vibrational pressure. This sonication process was done on ice for 4 cycles of 25 seconds with 10 seconds rest in between sonication cycles.
9. The tubes were then centrifuged for 20 minutes at 10,000 rpm.
10. Its pellet and supernatant were separated as done above. Pellet was resuspended using 400 µl of TE buffer.
Using of Enzymes (Method 1)

The 2 tubes of culture broth were obtained.
Centrifugation~~

 After centrifugation.
Supernatant was removed and 2 drops of lysosome was added to the resuspended cell pellet.


Freezing and Thawing (Method 2)

 Process of waiting for our turn...Zzzz
 Yipee!! haha...finally is our turn!
 Glows!!!
Procedure of Purification
1. Eight test tubes (“1 to 8”) and a “blank” were labeled and placed in a rack.
2. Blank was filled with 2ml ammonium bicarbonate; it was used as a guide to mark the rest of the test tubes with a line at the 2ml level.
3. The column was carefully drained into a waste beaker until the buffer was just even with the top of the gel bed.
4. Cell-free extract was transferred to the top of the gel bed by gently swirling a pipet around the inside edge of column, just above the top of the packed matrix.
5. Waste beaker was then removed. A test tube was placed under the stop cock to prepare collecting the fractions. Each test tube was filled up with buffer till the 2ml mark. This is known as a fraction.
6. Stop cock was slowly opened. Sample was then allowed to flow completely into gel bed and then collected in the first test tube. Flow rate was adjusted to a 1 drop/ 2 sec interval. The top 2-5mm column was run dry for a short time.
7. 50mM ammonium bicarbonate buffer was added to the top of the column while taking fractions. A 2-3cm column of buffer was maintained on top of the gel column to provide consistent flow of buffer through chromatography matrix.
8. 2ml fractions were continued to be taken until the 8th tube was filled.


Column was drained into the waste beaker.


Process of collecting functions...


Functions readings were taken.
Results of reading


As seen from the graph, a single, distinct and narrow peak resulted at around fraction 3. This shows that fraction 3 which has the highest OD reading as compared to the rest, contains the highest concentration of GFP. Therefore, the results suggest that a rather high degree of purification was achieved as most of the GFP was purified out from the sample at a single time point (fraction 3). Also, when viewed under the UV light, fraction 3 glowed brightest as compared to other fractions. Fractions 4 to 8 show zero OD reading, this suggests that GFP has been completely eluted out from the sample.
!!! Learning Points !!!
We were first given an introduction about the fermentor design, how does it works, the different parts and the uses of the different probes before we proceed to the actual experiment. We were also given practice on doing the sampling, so that we are more confident when doing the actual hourly sampling and hopes that nothing goes wrong since practise makes perfect.
We learnt that fermentation consists of three parts, media preparation, equipment preparation and seed preparation.
Three types of cell disruption methods (Enzymes, Freezing and Thawing and Sonication) were performed for this experiment; this is to further ensure that isolation is good whereby more of the product (GFP) can be obtained since it is intracellular.
If isolation was not done properly, it might affect the product yield. Therefore, this step was especially taken care of. Gel permeation chromatography was used for purification of GFP from the sample. This is also another step that determines the outcome of the result. Skills of using the spectrophotometer were also once again emphasized.
In conclusion, doing fermentation is never an easy job. Every single step has to be taken care of, as contamination at any step will simply kill the cells and ruin the whole experiment. And therefore, the importance of good aseptic techniques comes in.
Besides that, team work and cooperation is also very important, as when doing the hourly sampling, each of us has to make sure that we did our part correctly. We have to pay full attention when given the briefing on how to perform the sampling. Also, when doing some parts of the experiment, the work load is divided among us. It is when each of us played our part well, can the whole fermentation experiment then be a success.
♦ ♦ ♦ ♦ ♦ ♦ ♦ ♦ ♦ ♦ ♦ ♦ ♦ ♦ ♦ ♦ ♦ ♦ ♦ ♦ ♦ ♦ ♦ ♦


 It's so much easier in 3D, I swear. OTL


 After centrifugation.


 Demonstration by our Mr Ong!